
TL;DR
A cabinet delivery checklist is your structured process for receiving, inspecting, and documenting a cabinet shipment before and after the delivery driver leaves. The Bill of Lading (BOL) is the single most important document because your signature on it constitutes legal acceptance of the goods “as is.” You have only 5 business days to report concealed damage to the carrier, and vague notations like “subject to inspection” won’t hold up if you need to file a claim. This guide defines every term you’ll encounter, from scheduling through freight claims, and provides a printable quick-reference checklist.
Cabinet delivery day is where projects are saved or derailed. A single missing finished end panel can hold up an entire kitchen just as easily as a missing sink base. One homeowner on a remodeling forum noted that delivery day was “just unpacking and checking,” and if anything turned up missing or broken, the whole project got set back ten days or more.
Yet most people, contractors included, treat delivery as a formality. They sign the paperwork, stack the boxes in the garage, and don’t open anything until install day. By then, the window for filing a damage claim has closed, and the supplier has no obligation to replace what was broken in transit.
This glossary-style cabinet delivery checklist covers every term and procedure you need, organized in the order you’ll encounter them: pre-delivery preparation, day-of inspection, and post-delivery claims. Whether you’re a general contractor receiving freight weekly or a homeowner managing your first kitchen remodel, the process is the same.
What Is a Cabinet Delivery Checklist?
A cabinet delivery checklist is a step-by-step guide for verifying a cabinet shipment, documenting damage, and confirming that all ordered cabinets and accessories have arrived. Before signing the delivery receipt, count the cartons, inspect visible packaging damage, compare the shipment with the packing list, and record any shortages or damage in writing. After delivery, photograph the cabinets, inspect every unit promptly, and report problems to the supplier and carrier within the applicable deadlines. Keep the delivery paperwork and original packaging until any claim is resolved.
Cabinet Delivery Checklist: What to Do at Each Stage
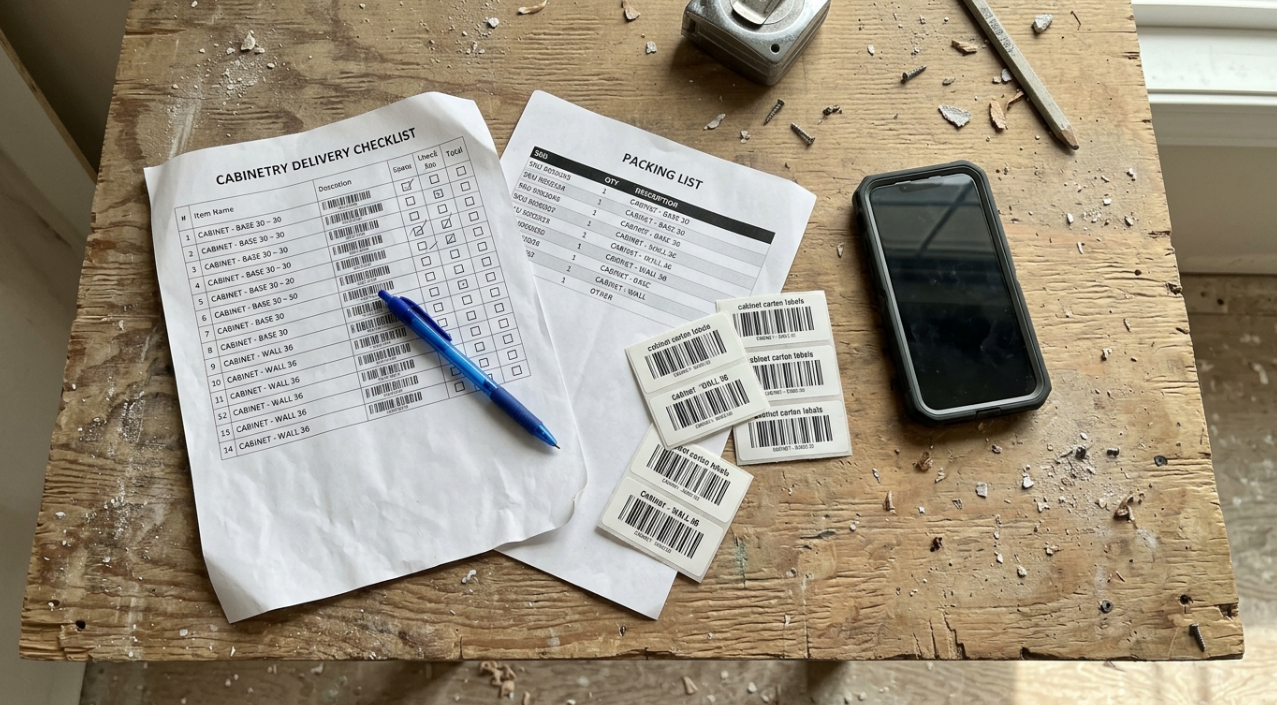
Use this checklist when receiving kitchen cabinets, bathroom cabinets, or other cabinet shipments. The exact procedure may vary by carrier and supplier, so follow the instructions provided for your delivery.
Stage | What to check | What to do |
|---|---|---|
Before delivery | Arrival time, unloading arrangements, and access | Confirm the delivery window, arrange helpers, and clear the route. |
Before signing | Carton count and visible packaging damage | Compare the shipment with the packing list and inspect the outside of every carton. |
Before the driver leaves | Missing cartons, crushed boxes, and torn packaging | Record specific exceptions on the delivery paperwork and request a copy. |
Within 24 hours, if possible | Cabinet condition, finishes, dimensions, and accessories | Open cartons safely, inspect every unit, and photograph problems. |
As soon as damage is discovered | Cracks, missing parts, incorrect finishes, or other discrepancies | Notify the supplier and carrier in writing and ask about the applicable claim deadline. |
Before installation | Completeness, product condition, and storage conditions | Resolve reported discrepancies and confirm that the cabinets are ready to install. |
Keep These Documents Together
Original order confirmation and cabinet layout
Packing list and Bill of Lading
Signed delivery receipt or Proof of Delivery
Photos of packaging before unpacking
Photos of damaged cabinets and missing or incorrect items
Written messages to the supplier and carrier
Claim reference numbers and any inspection reports
Best practice: Count and inspect as much as practical while the driver is present. If the driver cannot wait for a full unpacking, document the exterior condition, record visible exceptions, obtain the signed paperwork, and inspect the contents promptly after delivery.
Pre-Delivery Terms
Getting these right before the truck arrives prevents most delivery-day problems. The staging area, storage environment, and delivery type all need to be settled in advance, not figured out while the driver idles in your driveway.
Delivery Window
The scheduled arrival timeframe, usually given as a date range or morning/afternoon slot. Suppliers recommend confirming the delivery window with the carrier at least 48 hours in advance. Freight carriers sometimes adjust routes the night before, so a confirmation call protects you from showing up to an empty jobsite or missing the truck entirely.
Delivery Types: What You’re Actually Paying For
These five terms describe how far the carrier will move your cabinets. The differences matter because they determine whether you need to arrange unloading labor, and most homeowners don’t learn this until the truck is already there.
Curbside Delivery means pallets are placed at the curb or driveway edge. You are responsible for unloading from trailer height. One buyer on Trustpilot reported that the freight company placed only one pallet in the garage and left five more in the driveway because their delivery terms were curbside only, something they didn’t realize until after purchasing.
Liftgate Delivery means the pallet is lowered to ground level using a hydraulic lift on the truck. You still move it from there.
Threshold Delivery means goods are placed just inside the first doorway of the building.
Inside Delivery means cabinets are brought to the first available interior space on the ground floor.
White Glove Delivery means room-of-choice placement, unpacking, and debris removal. This is the most expensive option and the least common for cabinet freight.
If your supplier specifies garage or first-floor drop as their standard delivery scope, plan accordingly. Professional suppliers make these terms clear upfront so contractors can schedule unloading help without surprises.
Considering a cabinet supplier for your projects? Clear, published delivery terms are one of the first things to evaluate.
Cabinet Delivery Types Compared
Delivery terms determine where the carrier leaves your cabinets and how much unloading or moving you must arrange. Confirm the exact service included in your order because definitions can vary by carrier and supplier.
Delivery type | Typical service | What you may need to arrange |
|---|---|---|
Curbside delivery | Shipment is placed at the designated curbside or driveway delivery point, subject to the carrier’s terms. | Unloading, moving cartons to the garage or home, and sufficient labor |
Liftgate delivery | A hydraulic lift lowers the shipment from the truck to ground level. | Moving the shipment from the drop-off point to the staging area |
Threshold delivery | Shipment is brought to the first designated doorway or threshold. | Moving cabinets farther into the property, if not included |
Inside delivery | Shipment is carried into a specified interior area covered by the service. | Additional handling or movement beyond the agreed delivery area |
White-glove delivery | A higher-service option that may include room placement, unpacking, and packaging removal. | Confirming which tasks are included and which incur extra charges |
Before booking, ask the supplier or carrier:
Is unloading included in the quoted price?
Will the driver move cartons inside the building?
Are stairs, long carries, or restricted access covered?
Is packaging removal included?
How many people must be available to receive the shipment?
Do not assume that a delivery label guarantees a particular level of service. Request the scope in writing before the shipment leaves the warehouse.
Unloading Labor
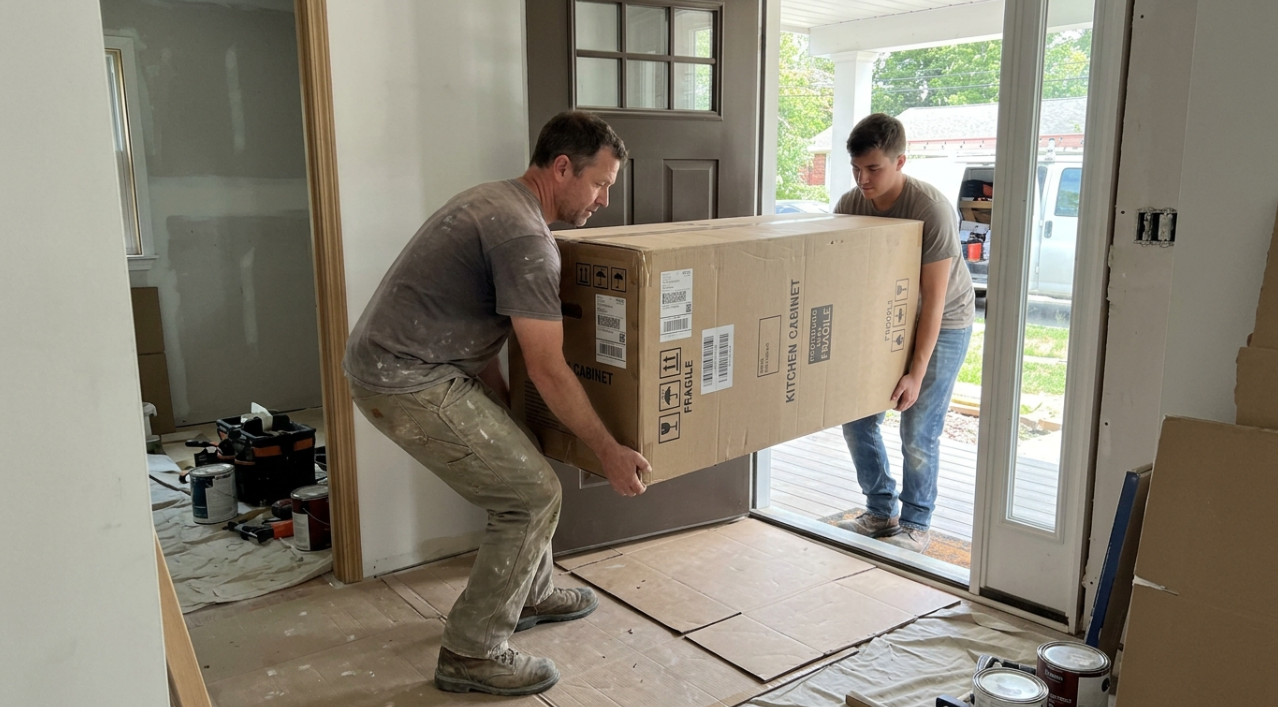
Many pre-assembled cabinets weigh over 100 pounds per unit. Delivery drivers, due to carrier insurance policies, are often unable to assist with unloading beyond what the delivery type covers. Have one or two additional people on site. This is a real pain point that catches first-time buyers off guard.
Staging Area
A clean, dry, protected space where cartons can be counted and sorted. The staging area should ideally be about twice the size of your existing kitchen, giving you room to organize units by location (upper left wall, base run, island) without stacking boxes on top of each other. A crowded garage or active jobsite increases the odds that hardware bags, filler strips, or small cartons get moved or lost before anyone checks them in.
Site Readiness
Cabinets should not be delivered just because demolition has started. For most kitchen projects, old cabinetry should be removed, rough plumbing and electrical work should be complete, and walls should be repaired before cabinets arrive. If the space isn’t ready, you’re paying to store cabinets in conditions that may not protect them.
For a more detailed breakdown of what comes before and after delivery, the kitchen remodel timeline guide covers each phase.
Storage Environment
Your first instinct might be the garage. Resist it. Cabinets should be stored in a conditioned space inside the home, protected from moisture and temperature extremes. Avoid unheated garages, undehumidified basements, and any space where fresh concrete or drywall mud is still curing. Particleboard and MDF that absorb moisture swell permanently, and solid wood doors acclimated in a damp garage will cup once the kitchen reaches normal indoor conditions.
Acclimation Period
The time cabinets need to adjust to the indoor humidity and temperature of the space where they’ll be installed. The general rule is 48 to 72 hours for factory-built or semi-custom cabinets in a relatively stable home environment. Fully custom wood cabinets with solid wood doors or face frames may need 5 to 7 days depending on the wood species. Skipping acclimation is one of the most common causes of post-install warping and door misalignment.
Clear Path
The delivery crew needs an unobstructed route from the truck to the staging area. Move vehicles from the driveway, remove rugs or obstacles from hallways, and secure pets. If there are narrow hallways, steep stairs, or limited parking, share that information when scheduling so the carrier can plan accordingly.
Day-of-Delivery Terms
This is the heart of any cabinet delivery checklist. Everything that happens between the truck arriving and the driver pulling away determines your leverage for the rest of the project.
Bill of Lading (BOL)
The Bill of Lading (BOL) is a shipping document that records key details about a freight shipment, including the parties involved, shipment information, and applicable transportation terms. It may also serve as evidence of the shipment’s condition or quantity when received, depending on the document and circumstances.
Before signing, compare the carton count with the packing list, inspect the exterior packaging, and document visible damage or shortages in writing. Use specific descriptions, such as “Carton #7 crushed on the left corner with a 6-inch tear,” rather than vague statements such as “possible damage.”
Read any acknowledgment or exception language carefully and request a copy of the signed document. A signature does not automatically eliminate every right to pursue a valid damage claim, but an accurate delivery record can make a claim easier to substantiate. Follow the carrier’s instructions and the terms that apply to your shipment.
Proof of Delivery (POD)
Sometimes used interchangeably with the BOL, the POD is the signed receipt confirming that the shipment was delivered. In some carrier systems, the POD is a separate document generated after the driver uploads the signed BOL. For your purposes, treat the BOL and POD as the same critical record: get a signed copy before the driver leaves.
Packing Slip / Packing List
An itemized list of carton contents, usually attached to or inside each box. Compare the packing slip against your original order confirmation to verify that every cabinet, panel, filler, and hardware kit is accounted for. The packing slip tells you what should be in the box; the BOL tells you how many boxes should be on the truck.
Carton Count
The total number of boxes in the shipment. Count every carton against the packing list before signing. If the count doesn’t match, note the shortage on the BOL immediately with specific numbers (for example, “Received 23 of 26 cartons, missing items #14, #18, #22”).
If the driver refuses to wait while you count, write on the BOL: “Driver would not wait so I can check that all items on my order were delivered.” Have the driver give you a signed copy. This notation preserves your ability to file a claim for missing items.
Visible Damage
Damage that’s apparent from outside the packaging without opening anything. Look for crushed boxes, torn packaging, puncture holes, forklift marks, and water or moisture stains. The condition of the packaging provides strong clues about what happened during transit.
Exception Notation
A written note on the BOL describing specific damage or shortages before you sign. This is where most people make a costly mistake. Avoid writing “subject to inspection” or “possible damage” because neither states specific damage and such notations are not considered valid by carriers. Instead, write exactly what you see: “Carton #7 crushed on left side, 4-inch tear in cardboard” or “Water staining on bottom of pallet, 3 cartons affected.”
Photograph every exception you note. Specifics matter, vague language doesn’t.
Joint Inspection
When you and the driver both examine a damaged carton on-site before signing. Opening a visibly damaged box together, with the driver present, strengthens any later claim because the carrier’s representative witnessed the condition firsthand. Not all drivers will agree to this, but it’s worth asking.
Inspection Terms
Once the truck is gone, the real work begins. Practitioners on Reddit and contractor forums consistently report that skipping inspection until install day is the number-one delivery mistake. As one contractor forum post put it: as soon as cabinets are delivered, open all boxes and inspect each unit so you have time to return or exchange them while still working on prep.
A Houzz forum contributor advises bringing printed copies of all product specs and order paperwork (two copies), plus a fully charged phone for photos. Good advice.
Finish Verification
Confirming that the delivered cabinets match the color, finish, and door style specified in your order. Even when the item numbers are correct, batch-to-batch color variation exists in both painted and stained finishes. Compare the delivered units against each other and against any sample you received. Visiting a showroom before ordering reduces color and style surprises at delivery.
Cabinet Delivery Inspection Checklist: What to Look For
Inspect the shipment systematically, starting with the packaging and moving to individual cabinet components. Use the order confirmation, cabinet schedule, and manufacturer specifications as your reference.
Inspection area | What to check | Potential issue to document |
|---|---|---|
Cartons and packaging | Crushed corners, punctures, tears, moisture stains, or broken pallet boards | Signs of impact, water exposure, or possible concealed damage |
Cabinet boxes | Cracks, dents, split joints, loose panels, and damaged corners | Structural damage that could affect installation |
Doors and drawer fronts | Scratches, chips, cracks, and finish inconsistencies | Cosmetic defects or damage to visible surfaces |
Finish and color | Color, sheen, door style, and finish against the approved order or sample | Incorrect finish, wrong style, or unexpected variation |
Dimensions and configuration | Cabinet width, height, depth, handedness, and specified configuration | Incorrect unit or mismatch with the cabinet plan |
Hardware | Hinges, drawer slides, shelf pins, fasteners, and included accessories | Missing or damaged components |
Filler strips and panels | Correct quantities, dimensions, finish, and edge condition | Missing fillers, damaged finished ends, or incorrect parts |
Doors and drawers | Opening, closing, alignment, and soft-close operation where fitted | Binding, loose hardware, or mechanisms that fail to operate |
Labels and item numbers | Carton labels against the packing list and order schedule | Wrong, duplicate, or unaccounted-for items |
Record the cabinet or carton number alongside each discrepancy. Take clear photographs of the entire item, the close-up damage, and the packaging. Keep damaged parts separate and do not discard packaging until the supplier or carrier advises that it is no longer needed.
Note: Minor alignment issues may be adjustable after installation, but cracks, split panels, incorrect components, and finish defects should be documented and discussed with the supplier before installation.
Edge Banding
The thin strip covering exposed panel edges, usually made of PVC or melamine matching the cabinet finish. Check for peeling, gaps, bubbles, or misalignment. Edge banding damage is common in transit because the edges of flat-pack panels take the most abuse during stacking and shifting.
For RTA (ready-to-assemble) cabinets, edge banding inspection is especially important because you’re handling individual panels, not a completed box.
RTA vs. Assembled Cabinet Inspection Differences
The inspection process differs significantly depending on what you ordered. Pre-assembled cabinets arrive as completed boxes, so you’re checking the unit as a whole: corners, joints, door alignment, drawer function. RTA cabinets arrive as flat-pack components, meaning you need to verify individual panels, hardware bags, cam locks, and assembly instructions. A single missing cam lock bag can delay assembly just as much as a cracked panel.
Reveal Gap
The space between a door or drawer front and the cabinet face frame (on framed cabinets) or between adjacent doors (on frameless cabinets). This gap should be consistent on all sides. Uneven reveals can indicate transit damage to hinges or the cabinet box itself. Keep in mind that minor door and drawer misalignments from shipping are often adjustable after permanent installation, so don’t panic over small inconsistencies. The distinction between framed and frameless cabinets matters here because frameless designs have tighter reveal tolerances.
Soft-Close Test
Open and close every door and drawer from multiple positions to confirm the soft-close mechanism engages consistently. A hinge that doesn’t catch or a drawer slide that slams instead of decelerating may have been knocked out of alignment during shipping. On pre-assembled units, this takes seconds per cabinet and catches problems that are invisible from the outside.
Hardware Kit
The bag or box of hinges, screws, cam locks, drawer slides, and shelf pins shipped with RTA cabinets. Open every hardware bag and verify contents against the included parts list. Missing hardware is one of the most frequently reported issues with flat-pack cabinet shipments, and a $0.50 cam lock can stall assembly for days if you have to reorder it.
Filler
A narrow strip (usually 3 inches or 6 inches wide) used to close gaps between cabinets and walls or between cabinets and appliances. Fillers are often packaged together in a single carton, making them easy to overlook during carton count. Verify that every filler listed on your order confirmation is present and undamaged.
Finished End Panel
A decorative panel applied to the exposed side of a cabinet run, at the end of a peninsula, or next to a refrigerator. Missing finished end panels are one of the most common delivery shortages. Because they’re large, flat, and packaged separately, they’re also prone to bowing or corner damage in transit.
Post-Delivery and Claims Terms
This is where most cabinet delivery checklist content falls short. The freight claim process is governed by specific deadlines and documentation requirements that most homeowners and many contractors don’t know about until it’s too late.
Concealed Damage
Damage discovered only after unpacking, where the exterior packaging appeared intact. Concealed damage is the trickiest category because the damage occurred somewhere during transit but wasn’t visible at delivery. You may have signed a clean BOL, and now you’re opening a box to find a cracked door or a split panel.
Concealed Damage Reporting Deadlines
Concealed damage is damage discovered after delivery that was not apparent from the outside of the packaging. For example, a cabinet door may arrive cracked inside a carton that shows no visible damage.
There is no single five-business-day notification rule that applies to every cabinet shipment. Reporting requirements can vary according to the carrier, shipping contract, supplier policy, and type of shipment. Do not assume that you have five business days—or that you can wait until installation—to report a problem.
To protect your ability to pursue a claim:
Photograph the carton and damaged cabinet as soon as the damage is discovered.
Notify the cabinet supplier and the responsible carrier in writing promptly.
Keep the Bill of Lading, delivery receipt, packing list, order confirmation, and all relevant photographs.
Retain the original packaging until the carrier or supplier confirms it is no longer needed.
Ask for written confirmation of the applicable reporting deadline and formal claim procedure.
For qualifying interstate motor-carrier shipments, the Carmack Amendment generally establishes a minimum nine-month period for filing a cargo claim, subject to the applicable legal requirements. This is not permission to delay reporting damage: notification and formal claim filing are different steps, and contractual procedures may require action sooner. Verify the terms governing your specific shipment.
Important: This guide provides general shipping information, not legal advice. If a claim is disputed or a deadline is unclear, consult the carrier’s written terms and a qualified professional.
Carmack Amendment
The federal law (49 USC §14706) governing carrier liability for goods damaged during interstate shipment. Under the Carmack Amendment, formal freight claims must be filed within 9 months from the date of delivery (or the expected delivery date if goods were never delivered). This is the outer boundary, but the 5-business-day concealed damage notification is the practical deadline that matters most.
If you need to reorder damaged cabinets, replacement timelines vary significantly. Understanding cabinet lead times for stock, semi-custom, and custom lines helps you plan around potential delays.
Freight Claim / Damage Claim
A formal request for replacement or compensation filed against the carrier (not the cabinet supplier, though the supplier often facilitates the process). Documentation required typically includes the bill of lading, proof of delivery, photos or video of damaged packaging and product, and a detailed written description of the damage.
Packaging Retention
In the event of a damage claim, the original packaging needs to be retained until the claim has been concluded. Carriers and suppliers may send an inspector to examine both the product and the packaging, and throwing away a crushed box eliminates evidence that supports your claim.
Don’t Install Damaged Cabinets
This one catches contractors by surprise. Do not install a damaged cabinet, even if the damage seems minor and you plan to file a claim. Installing a damaged unit can be interpreted as acceptance of the product’s condition and may void your claim. Note the damages on the delivery slip, photograph everything, and contact the supplier before assembling or installing anything that isn’t in perfect condition.
Restocking Fee
A percentage deducted if you return undamaged cabinets, typically because of ordering errors or design changes. Restocking fees vary by supplier and usually range from 15% to 30%. This doesn’t apply to damaged goods, which fall under warranty or freight claim processes. For more on supplier return policies and pricing structures, see the contractor cabinet pricing guide.
Touch-Up Kit
A manufacturer-supplied set of repair materials (filler sticks, markers, touch-up paint) for minor nicks and scratches that occur during installation, not for transit damage. Touch-up kits cover the small blemishes that are inevitable when handling and installing cabinets in a construction environment. They’re not a substitute for filing a claim on damaged goods.
Salvage
Using partially damaged goods at a reduced value rather than pursuing full replacement. For example, a cabinet with a small dent on its back panel might be usable if it faces a wall, but you’d negotiate a credit rather than wait for a replacement. This is a judgment call that should be made in consultation with the supplier, not unilaterally.
What to Do If Your Cabinet Delivery Is Damaged or Missing Items
Finding damaged cabinets or missing components does not necessarily mean your project is ruined. The next steps are to document the problem, notify the right parties, and establish how the issue will be resolved.
Step 1: Document the problem
Photograph the affected cabinet, close-up damage, carton label, and packaging. Record the cabinet number, item description, and quantity affected. Save the original order confirmation and delivery paperwork.
Step 2: Notify the supplier and carrier
Contact the cabinet supplier and the responsible carrier promptly. Describe the issue in writing, attach photographs, and ask for the applicable reporting deadline and claim procedure. Keep copies of all correspondence.
Step 3: Keep the affected items and packaging
Do not discard damaged components or packaging while the issue is under review. The carrier or supplier may request additional photographs, an inspection, or other evidence.
Step 4: Request a written resolution
Ask whether the next step is replacement, repair, a credit, or another remedy under the supplier’s policy and applicable shipping terms. Confirm the expected timeline and any requirements for returning the damaged goods.
Step 5: Reassess the installation schedule
Check whether the missing or damaged component is essential to the planned installation sequence. A missing finished end panel may affect a visible cabinet run, while missing hardware may prevent assembly. Coordinate with the installer before rearranging the schedule.
Step 6: Keep a claim record
Save the claim reference number, submitted evidence, inspection reports, and written decisions. Follow up before any applicable deadline expires.
Important: Do not assume that every damaged item qualifies for automatic replacement or that a carrier must approve every claim. The outcome depends on the evidence, applicable terms, warranty, and relevant law.
Quick-Reference Cabinet Delivery Checklist
Print this and hand it to whoever is receiving the shipment.
Before the Truck Arrives:
Confirm delivery window with the carrier at least 48 hours in advance.
Clear the staging area: dry, conditioned, roughly twice the kitchen’s footprint.
Arrange unloading help (1 to 2 additional people).
Have order confirmation, layout drawing, packing list, and a charged phone ready (two copies of paperwork if possible).
Clear the path from truck to staging area. Move vehicles, remove obstacles, secure pets.
While the Driver Is Present:
Count all cartons against the packing list before signing anything.
Inspect exterior packaging for crushed boxes, tears, punctures, moisture stains, and forklift marks.
Note all damage and shortages on the BOL with specific, descriptive language (not “subject to inspection”).
Request a joint inspection of any visibly damaged cartons.
Get a signed copy of the BOL from the driver before they leave.
Within 24 Hours of Delivery:
Unbox and inspect every cabinet.
Check all corners and edges for dents, cracks, chips, and compression marks.
Verify finish color, door style, and dimensions against your order specs.
For RTA cabinets, open every hardware kit and verify contents against the parts list.
Confirm all fillers and finished end panels are present and undamaged.
Test doors, drawers, and soft-close function on pre-assembled units.
Photograph any damage or discrepancies immediately.
Within 5 Business Days:
Report any concealed damage to the carrier and supplier in writing.
Do not install or assemble damaged cabinets.
Retain all original packaging until claims are resolved.
Before Installation:
Store cabinets in conditioned space for 48 to 72 hours minimum (5 to 7 days for solid wood custom cabinets).
Avoiding common remodel mistakes starts with getting delivery right. Every step above protects your timeline.
Why This Checklist Matters for Contractors and Homeowners Alike
For contractors managing multiple projects, a repeatable cabinet delivery checklist saves time and money. You stop discovering wrong sizes on install day. You stop eating the cost of damage that should have been a freight claim. You stop explaining to clients why their kitchen is delayed by two weeks because a finished end panel was backordered.
For homeowners, the stakes are different but no less real. You probably haven’t received a pallet of cabinets before. You might not know that the driver won’t help you unload, or that your signature on a piece of paper you barely glanced at just waived your right to a claim. Now you do.
Looking for a cabinet supplier that publishes clear delivery terms, keeps stock in local warehousing, and backs products with warranties and materials compliance? That’s the kind of supplier relationship that makes delivery day predictable instead of stressful.
Frequently Asked Questions
What should I write on the Bill of Lading if cabinets arrive damaged?
Write specific, descriptive notes. For example: “Carton #7 crushed on left corner, 6-inch tear in cardboard, contents may be damaged.” Avoid vague language like “subject to inspection” or “possible damage,” which carriers do not consider valid exception notations.
How long do I have to report concealed damage on a cabinet delivery?
The standard rule is 5 business days from the date of delivery to notify the carrier. Some suppliers set their own windows of 5 to 7 days. Under the Carmack Amendment, formal freight claims must be filed within 9 months, but missing the initial 5-business-day notification window almost always results in a denied claim.
What is the difference between curbside and threshold delivery for cabinets?
Curbside delivery means the carrier places pallets at the curb or driveway edge, and you handle all unloading. Threshold delivery means goods are brought to just inside the first doorway of your home or building. The cost difference is significant, and so is the labor requirement on your end.
Should I open cabinet boxes before the delivery driver leaves?
If the driver is willing to wait, yes, especially for cartons with visible exterior damage. A joint inspection with the driver present strengthens any future claim. If the driver won’t wait, count all cartons, note any visible packaging damage on the BOL, and plan to open everything within 24 hours.
How long should cabinets acclimate before installation?
Factory-built and semi-custom cabinets need a minimum of 48 to 72 hours in the room where they’ll be installed (or a space with similar temperature and humidity). Fully custom solid wood cabinets may need 5 to 7 days depending on the wood species. Never store cabinets in an unheated garage or a space with curing concrete or drywall mud.
Do delivery drivers help unload cabinets?
In most cases, no. Carrier insurance policies typically prevent drivers from assisting beyond the scope of the delivery type you purchased. If you purchased curbside or liftgate delivery, you’ll need your own labor to move cabinets from the truck or driveway to your staging area. Plan for 1 to 2 helpers.
What happens if I install a damaged cabinet before filing a claim?
Installing a damaged cabinet can be interpreted as acceptance of its condition, potentially voiding your freight claim or warranty coverage. Always contact the supplier before assembling or installing any unit that shows damage, no matter how minor it appears.
Does the cabinet delivery checklist differ for RTA vs. pre-assembled cabinets?
Yes. Pre-assembled cabinets are inspected as completed units: check corners, joints, doors, and drawers. RTA cabinets arrive as flat-pack components, so you need to verify individual panels, edge banding, hardware bags, cam locks, and assembly instructions. A missing hardware bag on an RTA order can stall your project just as effectively as a cracked pre-assembled box.