TL;DR
The kitchen design process is the planning stage of a kitchen remodel, from the initial consultation to final design approval and ordering. It typically takes 2–6 weeks, depending on the project’s complexity, material selections, and revision requirements. The main steps include defining project needs and budget, measuring the space, planning the layout, selecting cabinets and finishes, reviewing design drawings, and approving specifications. Careful planning helps prevent measurement errors, budget overruns, ordering delays, and costly changes during construction.
Most people underestimate how much happens before a hammer swings. The kitchen design process covers everything from your first conversation with a designer to the moment you sign off on final drawings, and it involves dozens of terms that can feel unfamiliar even to experienced homeowners. According to industry data, the design phase alone runs 2 to 6 weeks, and the total remodel can stretch from 8 to 46 weeks depending on scope.
This glossary exists to fix a common problem: miscommunication. Whether you’re a homeowner starting a remodel or a trade professional who needs shared vocabulary with clients, understanding these terms in the order you’ll actually encounter them prevents costly changes and timeline blowouts.
For a companion deep dive on scheduling, see the phase-by-phase timeline guide.
The sections below follow the natural flow of the kitchen design process, from first meeting to final walkthrough.
What Is the Kitchen Design Process?
The kitchen design process is a series of planning steps used to turn a homeowner’s needs, budget, and available space into an approved kitchen layout and product specification. It typically takes 2–6 weeks, although complex remodels may require longer.
The process generally includes seven stages:
Discovery: Define goals, lifestyle needs, budget, and project scope.
Measurement: Record room dimensions, windows, doors, utilities, and structural constraints.
Space planning: Develop a functional layout with suitable work areas, clearances, and traffic flow.
Material selection: Choose cabinets, countertops, flooring, lighting, hardware, and finishes.
Design development: Prepare floor plans, elevations, specifications, and 3D renderings.
Design approval and ordering: Confirm the final design, prepare product lists, and order materials.
Pre-construction coordination: Coordinate permits, delivery schedules, and contractor requirements before work begins.
The exact sequence varies by project. Custom cabinetry, structural changes, special-order appliances, and multiple design revisions can extend the timeline. Construction and installation are separate stages that follow design approval.
Planning a project in Washington State? Krafter’s Land offers free design and quotes with 2020 Design files and 3D project previews to help streamline the early phases.
Kitchen Design Glossary: Key Terms at a Glance
Use this quick-reference table to understand the most important terms in the kitchen design process before exploring each phase in detail.
Term | Simple Definition | When It Matters |
|---|---|---|
Initial consultation | First meeting to discuss goals, budget, and project scope | Project planning |
Scope of work (SOW) | Written description of included and excluded work | Before pricing and contracting |
Site survey | Detailed measurement of the existing kitchen | Before layout development |
As-built drawings | Drawings documenting existing site conditions | Before proposing changes |
Work triangle | Relationship between the sink, cooking appliance, and refrigerator | Layout planning |
Work zones | Areas organized around tasks such as prep, cooking, and cleaning | Layout planning |
Work aisle | Space between opposing work surfaces or cabinets | Layout planning |
Floor plan | Overhead drawing showing the kitchen layout | Design development |
Elevation drawing | Straight-on view of a kitchen wall | Cabinet and appliance planning |
Cabinet overlay | How cabinet doors cover or relate to a face frame | Cabinet selection |
3D rendering | Visual representation of the proposed kitchen | Design review |
Design signoff | Formal approval of the final design and specifications | Before ordering |
Bill of materials (BOM) | List of products, components, and quantities | Ordering |
Lead time | Time between placing an order and receiving the product | Schedule planning |
Change order | Document recording an agreed change to project scope, cost, or schedule | After contract approval |
Punch list | List of outstanding corrections or incomplete work | Project closeout |
The sections below explain these terms in the order they commonly arise during a kitchen remodel. Actual terminology and workflows can vary between designers, cabinet suppliers, and contractors.
Kitchen Design Process Timeline: How Long Does Each Stage Take?
A typical kitchen design project takes approximately 2–6 weeks, although the timeline depends on the size of the kitchen, the number of design revisions, the availability of measurements and product information, and the complexity of the project.
Design Stage | Estimated Duration | Main Deliverable |
|---|---|---|
Initial consultation and needs assessment | 1–3 days | Project brief and preliminary budget |
Site measurement and assessment | 1–5 days | Verified measurements and existing-condition records |
Layout development | 3–10 days | Proposed floor plan and layout options |
Cabinet and material selection | 3–10 days | Preliminary product and finish selections |
Drawings and 3D visualization | 3–10 days | Floor plans, elevations, and renderings |
Design revisions and approval | 2–7 days | Approved design and specifications |
Important: These are indicative planning estimates, not guaranteed durations. Some stages can happen concurrently, while complex projects may require several rounds of revisions. The total elapsed time may therefore be shorter or longer than the sum of the individual estimates.
Design approval does not mean construction can begin immediately. Product lead times, permit approvals, contractor scheduling, and site preparation can add weeks or months before installation.
Phase 1: Discovery and Needs Assessment
This is where every kitchen design process begins. Before any measurements or software, you need to establish what you actually want, what you can spend, and how the project will be delivered.
Initial Consultation
The first meeting between homeowner and designer or contractor. You’ll discuss goals, budget range, lifestyle needs, and project scope. Most initial consultations are free, last 30 to 60 minutes, and set the tone for everything that follows.
Lifestyle Mapping
A good designer doesn’t just ask what you want your kitchen to look like. They listen for patterns: daily routines, frustrations with the current space, wish lists, and quirks. Do you cook for two or host parties for twenty? Do kids do homework at the island? Lifestyle mapping captures how you actually use the room, not just how you want it to appear.
Scope of Work (SOW)
A written description of what’s included in the project and, just as importantly, what’s excluded. The SOW defines boundaries for cabinets, countertops, flooring, plumbing, electrical, and anything else. Without a clear SOW, disagreements about what was “supposed to be included” become inevitable.
Design-Build
A project delivery method where one firm handles both design and construction. This eliminates the gap between designer and contractor, reducing finger-pointing and communication breakdowns. The alternative is hiring a designer and general contractor separately, which offers more flexibility but requires more coordination.
Design Brief and Mood Board
Visual guides assembled from design magazines, websites, and social media showing colors, textures, and layout inspirations. These keep the project consistent and focused throughout the kitchen design process. A mood board is not decoration; it’s a communication tool that prevents “that’s not what I pictured” moments later.
Budget Allocation
Breaking the total remodel budget into category buckets. Industry benchmarks put cabinets at 25 to 35% of the total budget (consistently the largest single line item), labor at 20 to 35%, appliances around 15%, countertops at 10 to 15%, and flooring and tile at 5 to 10%.
For context, the national average kitchen remodel cost in 2026 is $26,990 based on data from over 13,100 verified projects, with most homeowners spending between $14,590 and $41,620. The 2026 Houzz U.S. Kitchen Trends Study found that major remodels hit a median of $55,000, while kitchens 250 square feet or larger reach $75,000 at the median.
Feasibility Assessment
A feasibility assessment determines whether a proposed kitchen design can realistically fit the available space, budget, building conditions, and project requirements. It considers structural constraints, plumbing and electrical needs, product availability, and any necessary permits.
For example, a homeowner may want to move a sink to an island. Before finalizing the layout, the designer and relevant trades need to assess plumbing routes, drainage requirements, floor construction, and associated costs. Identifying these constraints early reduces the risk of redesigning the kitchen after materials have been selected.
Design Revision
A design revision is a change made to a proposed kitchen layout, drawing, specification, or finish selection following feedback from the homeowner or project team. Revisions may involve moving an island, changing cabinet dimensions, adjusting appliance locations, or selecting a different countertop.
The number of revision rounds depends on the designer’s agreement with the client. Confirming revision allowances, additional fees, and approval procedures at the start helps prevent misunderstandings later in the project.
Phase 2: Measurement and Site Assessment
Once you know what you want, the next step in the kitchen design process is understanding what you’re working with. Accurate measurements dictate every layout decision that follows.
Site Survey / Field Measure
Physical measurement of the existing space, capturing all architectural elements, mechanical systems, window placements, and door locations. For renovation projects, this must be detailed and thorough. Even small measurement errors compound across a full kitchen. For step-by-step guidance, see how to measure kitchen cabinets.
Kitchen Measurement Checklist
Before developing a final kitchen layout, the designer should document the existing space and verify the dimensions that affect cabinet placement, appliance fit, and construction.
Measurement or Detail | What to Record | Why It Matters |
|---|---|---|
Room dimensions | Wall lengths, room width, and ceiling height | Establishes the available design space |
Doors and windows | Widths, heights, locations, and opening directions | Prevents conflicts with cabinets and appliances |
Utilities | Plumbing, electrical, gas, and ventilation locations | Helps determine whether services can remain in place |
Structural elements | Columns, beams, bulkheads, and suspected load-bearing walls | Identifies constraints on layout changes |
Existing appliances | Dimensions, locations, and utility requirements | Helps verify fit and service connections |
Wall and floor conditions | Uneven surfaces, out-of-square corners, and changes in floor level | Helps plan accurate cabinet installation |
Access and clearances | Door swings, walkways, and appliance openings | Reduces circulation and usability problems |
Measurements should be verified on-site before cabinetry is ordered. For major renovations, the designer and contractor should coordinate any required structural, plumbing, electrical, or ventilation assessments with qualified professionals.
For a practical walkthrough, see the step-by-step guide to measuring kitchen cabinets.
Spatial Assessment
Goes beyond raw dimensions to evaluate natural walking paths, sightlines from adjoining rooms, window placement and light flow, structural limitations, and existing plumbing, gas, and electrical points. This assessment determines what’s possible without major structural work.
As-Built Drawings
Floor plans documenting the existing conditions of the kitchen before any design changes. These become the baseline that every proposed layout is compared against.
Load-Bearing Wall
A structural wall that supports the weight of the structure above it. Removing or modifying one requires engineering review and building permits. Many open-concept kitchen plans depend on removing a wall, so identifying load-bearing walls early is critical to keeping the kitchen design process on track.
Rough-In Points
The existing locations of plumbing supply and drain lines, gas lines, and electrical circuits. These points heavily influence layout options because moving them adds cost and extends timelines. A good designer works with existing rough-in points where possible and moves them only when the layout genuinely demands it.
Phase 3: Layout and Space Planning
This is the phase where the kitchen design process gets visual. Layout and space planning translate your needs and measurements into a workable floor plan, and the terminology here comes directly from industry standards set by the National Kitchen and Bath Association (NKBA).
Kitchen Work Triangle
The kitchen work triangle is a traditional planning concept that connects the three primary work areas: the sink, the cooking appliance, and the refrigerator. The goal is to reduce unnecessary movement between food storage, preparation, and cooking.
Designers often use the work triangle as a starting point when planning compact kitchens, particularly those used by one primary cook. Commonly cited NKBA planning criteria include limiting the combined distance between the three points and avoiding legs that are too short or too long. Verify the applicable dimensions against the current National Kitchen and Bath Association (NKBA) guidelines before using them as a formal design standard.
The work triangle is not a universal solution. Larger kitchens, open-plan layouts, and households with multiple cooks may benefit more from task-based work zones, clear circulation routes, and carefully placed landing surfaces.
Kitchen Work Zones
A modern alternative that organizes the kitchen by task rather than geometry. Instead of three fixed points, work zones group cabinets, appliances, and countertop space into functional clusters: food storage, prep, cooking, cleaning, and serving. Work zones shine in open-concept or larger kitchens where multiple family members or guests use the space simultaneously. Many designers now treat the work triangle as a reference point rather than a strict rule, combining it with zone-based planning.
Work Aisle
The space measured between the fronts of opposing countertops, tall cabinets, or appliances. NKBA standards call for a minimum of 42 inches for one cook and 48 inches when multiple cooks share the kitchen.
Walkway
A traffic path through or past the kitchen, distinct from a work aisle. Minimum 36 inches wide per NKBA guidelines.
Landing Area / Landing Zone
Countertop space immediately adjacent to an appliance, essential for safety and workflow. NKBA recommends at least 24 inches on one side of the sink and 15 inches on either side of the cooktop. Skipping adequate landing zones is one of the most common kitchen design process mistakes.
Floor Plan
A two-dimensional drawing of the kitchen viewed from above. It shows the position of cabinets, appliances, islands, and other fixed elements relative to walls, windows, and doors.
Elevation Drawing
A straight-on side view of a single wall, showing cabinet heights, window placement, appliance positions, and vertical clearances. Where floor plans show width and depth, elevations show height and proportion.
Kitchen Layouts
The six standard configurations that form the foundation of nearly every kitchen design process:
Galley: Two parallel runs of cabinets with an aisle between them. Efficient for small spaces.
L-Shape: Cabinets along two perpendicular walls. Flexible and common.
U-Shape: Cabinets on three walls, wrapping the cook in workspace.
G-Shape: A U-shape with a partial fourth wall or peninsula.
One-Wall: Everything along a single wall. Typical in apartments and small homes.
Island: Any layout with a freestanding cabinet unit, usually in the center, adding prep space, seating, or storage.
Kitchen Layout Comparison: Which Configuration Works Best?
The best kitchen layout depends on the room’s dimensions, the location of doors and windows, household routines, storage requirements, and the number of people who use the kitchen at the same time.
Layout | Main Characteristics | Best Suited For | Potential Limitation |
|---|---|---|---|
Galley | Two parallel cabinet runs | Narrow kitchens and efficient workflows | Limited space for passing if the aisle is too narrow |
L-shaped | Cabinets on two adjoining walls | Open-plan rooms and flexible layouts | Corner storage may need careful planning |
U-shaped | Cabinets along three walls | Home cooks who need extensive workspace | Can feel enclosed in a small room |
G-shaped | U-shaped arrangement with an additional peninsula | Kitchens needing more counter space or separation | May restrict circulation if overcrowded |
One-wall | Cabinets and appliances along a single wall | Studios, apartments, and compact spaces | Limited counter space and storage |
Island | A freestanding island added to a suitable base layout | Larger kitchens needing prep space or seating | Requires adequate clearance on all sides |
An island is an addition to a kitchen layout rather than a complete wall configuration in itself. It can be incorporated into suitable L-shaped, U-shaped, or one-wall kitchens when room dimensions and circulation allow.
Before choosing a layout, verify work aisles, walkways, appliance door swings, landing surfaces, and accessibility requirements. A layout that fits on paper may still be impractical if doors collide or people must cross the main cooking area to move through the room.
Peninsula
An extension that adds countertop space, storage, and seating by creating a perpendicular run of base cabinets anchored to the wall. Think of it as a connected island.
Traffic Flow
The paths people naturally walk through the kitchen. Good traffic flow means no one has to cross through a work zone to get to the refrigerator or back door. Practitioners on Reddit consistently flag poor traffic flow as the single biggest regret in kitchen design, noting that layouts that look great on paper can be miserable to live in when they force people to walk through the cook’s workspace.
Phase 4: Cabinet and Material Selection
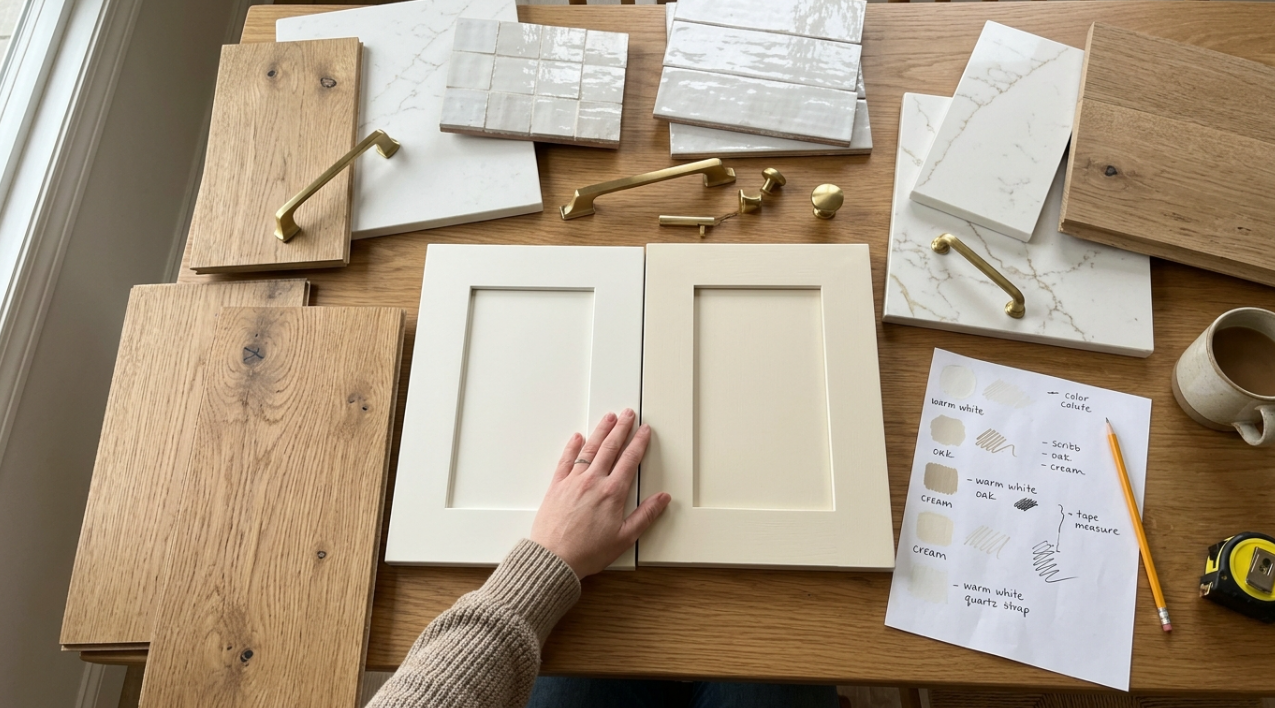
Material selection is where the kitchen design process gets tangible. This is also where decisions start locking in timelines and budgets, so understanding the terminology is essential for avoiding surprises.
Framed Cabinets
Cabinets with a face frame (typically 3/4-inch solid wood) attached to the front of the cabinet box. This is the traditional American style, and Shaker doors are the most popular option. The face frame adds strength but slightly reduces the interior opening width. For a thorough comparison, see the framed vs. frameless cabinets guide.
Frameless (European) Cabinets
No face frame. Doors and drawers attach directly to the cabinet box, offering roughly 1.5 inches more interior width per opening. The result is a clean, modern look with full-access storage. Frameless construction dominates contemporary kitchen design.
RTA (Ready-to-Assemble) Cabinets
Cabinets shipped flat-packed for assembly on site. RTA offers the fastest lead times (as little as 1 to 2 weeks) and the lowest cost per unit. Quality varies widely by manufacturer, so construction details matter. The RTA vs. custom cabinets guide breaks down the trade-offs.
Semi-Custom Cabinets
Built to order with predefined size options and finish selections. Lead times typically run 4 to 8 weeks. Semi-custom gives you more flexibility than stock without the full wait and cost of custom.
Custom Cabinets
Built from scratch to exact specifications. Lead times range from 8 to 16 weeks or more. Custom is the right choice when unusual dimensions, unique materials, or architectural details demand it, but the timeline impact is significant.
For contractors comparing supplier options, Krafter’s Land publishes lead times and pricing for trade accounts across their frameless and framed lines.
Cabinet Overlay
Refers to how the door sits relative to the face frame. Full overlay covers most of the frame for a seamless appearance. Partial (or half) overlay reveals more of the frame between doors. Overlay choice affects both aesthetics and hardware selection. Learn more about cabinet door styles to see how overlay interacts with design.
Soft-Close
A hinge and drawer-slide mechanism that prevents slamming. Standard on most modern cabinetry, soft-close is one of those features that feels unnecessary until you live without it.
Countertop Templating
The process of creating an exact template of the cabinet tops after cabinet installation, before countertop fabrication begins. Templating happens on-site using laser or physical templates and ensures the countertop fits precisely, including cutouts for sinks and cooktops.
Quartz (Engineered Stone)
A man-made surface composed of roughly 90 to 94% natural quartz crystals bound with resin. Non-porous, requires no sealing, and available in a wide range of colors and patterns. Quartz has become the dominant countertop material in kitchen remodels. For a breakdown of the options, see prefab vs. slab quartz.
Prefab Quartz
Pre-cut countertop slabs in standard sizes with pre-finished edges. Faster installation and lower cost than custom slab fabrication, making prefab a strong choice when dimensions fit and budget matters.
Backsplash
Tiles or another waterproof material installed between the countertop and upper cabinets, protecting the wall from water, grease, and food splatter. Backsplash selection typically comes after countertop decisions in the design funnel (more on that below).
Phase 5: Design Drawings and Approval
This phase of the kitchen design process produces the documents that everyone, from the homeowner to the installer, will reference throughout construction. Getting this right prevents the most expensive mistakes.
2020 Design (Cyncly Design Flex)
The industry-leading CAD software for kitchen and bath design, now part of Cyncly. It connects to thousands of manufacturer catalogs, generates accurate layouts and realistic 3D renderings, and supports the entire workflow from initial consultation to cabinet ordering and production planning. Most professional kitchen showrooms and cabinet retailers use it. Krafter’s Land provides 2020 Design files as part of their free design service, so contractors and dealers receive production-ready files they can act on immediately.
3D Rendering
A photorealistic visualization of the proposed kitchen, showing materials, finishes, lighting, and spatial relationships before any construction begins. Consumer Reports advises against settling for two-dimensional drawings, especially on major projects where the layout is reconfigured, because 3D renderings help visualize the space far more accurately than flat elevations.
CAD (Computer-Aided Design)
The category of software used to create technical drawings and plans. In the kitchen design process, CAD produces floor plans, elevations, and 3D models with precise dimensions that construction teams rely on.
Design Signoff / Design Approval
The formal moment when the client confirms the final layout, all material selections, and specifications. This is the point of no return in the kitchen design process. Changes after signoff trigger delays, reorders, and upcharges. Treat signoff seriously.
Construction Documents
Permit-ready drawings that include all specifications needed for construction: dimensions, materials, electrical and plumbing locations, and notes for inspectors. Typically produced 1 to 2 weeks after design signoff.
Bill of Materials (BOM)
A complete list of every product, SKU, and quantity needed for the project, generated directly from the approved design. The BOM drives ordering and ensures nothing is forgotten or double-ordered.
Phase 6: Ordering and Pre-Construction
Between design approval and the first day of demolition, there’s a critical window where materials are ordered, permits are filed, and the project schedule takes shape. This phase of the kitchen design process often determines whether the project finishes on time.
Lead Time
The period from when an order is placed to when products arrive. The biggest variable in any kitchen remodel is cabinet lead time: RTA stock cabinets can arrive in 1 to 2 weeks, while custom builds stretch to 16 weeks or more. Ordering immediately after design signoff is critical. For a detailed comparison, see cabinet lead times by type.
Long-Lead Items
Products with extended manufacturing or shipping times that must be ordered first. Custom cabinets, specialty appliances, imported tile, and unique hardware all qualify. Identifying long-lead items during the design phase prevents the most common scheduling disasters.
Building Permit
Official authorization from the local building department, required for structural modifications, plumbing changes, or electrical work. Permit review takes 1 to 4 weeks or more depending on your municipality. Skipping permits creates legal liability and can derail a future home sale. The kitchen remodel checklist covers what typically requires a permit.
CARB Phase 2 / EPA TSCA Title VI
Federal emissions standards for composite wood products like plywood, MDF, and particleboard. These regulations limit formaldehyde emissions and are important for indoor air quality and code compliance. Krafter’s Land cabinets comply with both CARB Phase 2 and EPA TSCA Title VI standards.
Change Order
A formal document modifying the original scope, materials, or cost of the project after the contract is signed. Change orders are a normal part of construction, but frequent change orders signal that the kitchen design process was rushed. Every change order costs time and money.
Phase 7: Construction and Installation
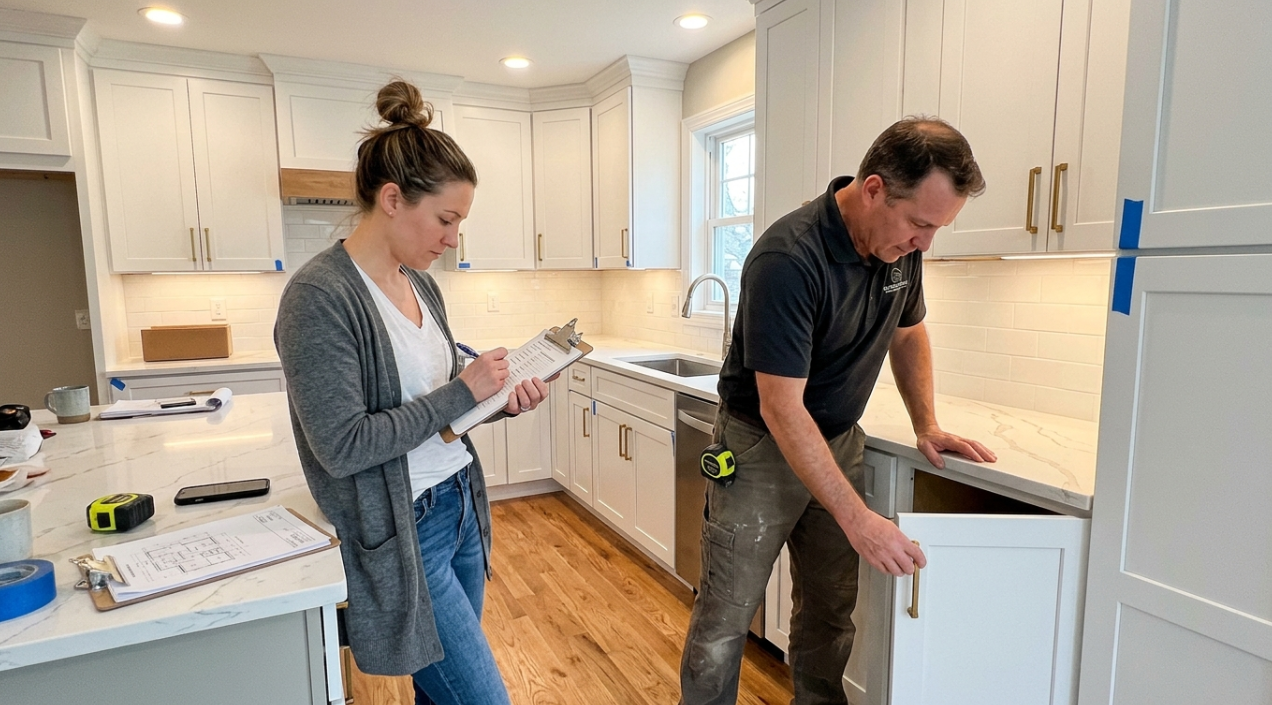
Once materials arrive and permits are in hand, construction begins. While this article focuses on the design process, understanding installation terms helps you see how design decisions play out in the real world.
Demolition (Demo)
Removal of existing cabinets, countertops, flooring, and fixtures. Typically takes 1 to 5 days depending on the kitchen size and how much is being gutted. Demo is loud, dusty, and fast.
Rough-In
After demolition, behind-the-walls work begins: running new electrical lines, moving plumbing, adding gas lines, and making minor framing adjustments. Rough-in typically takes 1 to 3 weeks and must pass inspection before walls are closed up.
Drywall and Paint
Wall restoration after rough-in work. This must be completed before cabinet installation begins.
Cabinet Installation
Mounting and leveling cabinets per the approved design. Proper installation requires perfectly level and plumb placement, because even small errors cascade into problems with doors, drawers, and countertop fit.
Countertop Fabrication and Install
After cabinets are installed and verified, a templater visits the site to take exact measurements. Slabs are then cut, polished, and installed, typically taking 3 to 10 business days for fabrication after templating.
Punch List
A final checklist of minor corrections, touch-ups, or incomplete items identified during the walkthrough. The punch list is the last step before project closeout. Common items include paint touch-ups, hardware adjustments, caulk gaps, and minor alignment fixes.
Final Walkthrough
A joint inspection between the homeowner and contractor to verify all work meets the approved design and contract. Walk every inch of the kitchen with the design drawings in hand.
The Design Funnel: A Decision-Making Framework
One of the most practical concepts in the kitchen design process is the “design funnel,” a decision-making sequence that prevents renovation regrets. The idea is simple: start with the biggest, hardest-to-change elements and narrow down from there, letting each choice inform the next.
Here’s the order experienced designers recommend:
Layout and cabinets (the largest investment and the hardest to change)
Countertops (must complement cabinet color and style)
Backsplash (ties countertops to the wall and sets the accent tone)
Flooring (must work with everything above it)
Lighting (functional first, decorative second)
Hardware (the finishing touch, easiest to swap later)
Making decisions in this order prevents the common trap of falling in love with a backsplash tile and then trying to build an entire kitchen around it. As practitioners note, starting with the biggest elements and narrowing down ensures no decision is made in a vacuum.
Common Kitchen Design Process Mistakes
Mistake | Why It Matters |
|---|---|
Skipping 3D renderings | Flat drawings can’t show you how the space will feel. On any major project, 3D visualization catches problems that floor plans miss. |
Ignoring traffic flow | Reddit’s r/HomeDecorating members regularly share kitchen design regrets, and disjointed traffic flow is one of the most common complaints, making daily routines frustrating. |
Rushing measurements | Miscommunication during the planning phase leads to permanent structural errors. Measure twice, then measure again. |
Making decisions in isolation | Choosing a countertop without considering cabinet color, or picking flooring before finalizing the layout, creates mismatched results. Use the design funnel. |
Underestimating lead times | Stock cabinets arrive in 1 to 2 weeks, but custom cabinetry can take 16 or more weeks. Order the moment design is approved. |
Skipping the scope of work | Without a written SOW, “I thought that was included” becomes the most expensive phrase in your remodel. |
For a deeper look, the kitchen remodel mistakes guide covers costs and fixes for each of these.
Kitchen Remodel: Quick Cost and Timeline Benchmarks (2026)
Category | Benchmark |
|---|---|
National average remodel cost | $26,990 (range: $14,590 to $41,620) |
Major remodel median | $55,000 |
Large kitchen (250+ sq ft) median | $75,000 |
Design phase | 2 to 6 weeks |
Permit review | 1 to 4+ weeks |
Demolition | 1 to 5 days |
Rough-in | 1 to 3 weeks |
Installation and finishes | 3 to 6 weeks |
Punch list and closeout | 1 to 2 weeks |
Total project (start to finish) | 8 to 46 weeks |
Frequently Asked Questions
How long does the kitchen design process take?
The design phase typically runs 2 to 6 weeks, covering layout decisions, material selections, and production of drawings or 3D renderings. Complex projects with custom elements or multiple revision rounds can push this to 6 weeks or more.
What is the difference between the work triangle and work zones?
The work triangle is a 1940s concept focused on the distance between the sink, stove, and refrigerator, and it works best in compact kitchens with one cook. Work zones are a modern approach that organizes the kitchen by task (prep, cook, clean, store), which suits open-concept layouts and multiple users. Most designers now blend both concepts.
What should I bring to my first kitchen design consultation?
Bring photos of kitchens you like, a rough budget range, a list of what frustrates you about your current kitchen, and any measurements you already have. If you’ve created a mood board on Pinterest or Houzz, bring that too. The more information your designer has at the start, the faster the kitchen design process moves.
When should I order cabinets?
Order as soon as design signoff is complete. Stock and RTA cabinets arrive in 1 to 2 weeks, semi-custom takes 4 to 8 weeks, and custom cabinetry can require 8 to 16 weeks or more. Cabinet delivery is the most common bottleneck in kitchen remodels.
Do I need a building permit for a kitchen remodel?
If the project involves structural changes, plumbing relocation, or electrical work, yes. Cosmetic updates like replacing cabinets and countertops within the same footprint usually don’t require permits. Always check with your local building department.
What does “design signoff” actually commit me to?
Design signoff is a formal approval of the final layout, material selections, and specifications. After this point, any changes become change orders that cost additional money and time. Think of it as the last chance to make revisions without financial consequences.
How much of my budget should go to cabinets?
Cabinets typically absorb 25 to 35% of the total kitchen remodel budget, making them the single largest line item. This percentage holds whether you’re spending $15,000 or $75,000, though the quality tier changes significantly across that range.
What is 2020 Design software and why does it matter?
2020 Design (now called Cyncly Design Flex) is the most widely used CAD program in the kitchen and bath industry. It produces accurate floor plans, elevation drawings, and photorealistic 3D renderings tied to real manufacturer catalogs. When your designer uses 2020, you get renderings that reflect actual products you can order, not generic placeholders.
For contractors and dealers in Washington State, Krafter’s Land provides free design, 2020 Design files, and 3D project previews to speed up the kitchen design process from first consultation to cabinet ordering. Visit the best cabinet supplier for contractors page for trade account details.