
TLDR
A kitchen remodel checklist should cover more than tasks. It should define the terms contractors use, sequence the decisions that prevent costly delays, and flag the permits your project may need. This guide works as both a checklist and a glossary, covering scope tiers, budgets, cabinets, countertops, flooring, permits, contractor verification, procurement lead times, and construction sequencing. Whether you are a homeowner preparing to hire or a trade professional coordinating a project, use it to get everyone speaking the same language before demolition starts.
Direct Answer: What Should Be on a Kitchen Remodel Checklist?
A kitchen remodel checklist should include planning your remodel scope, setting a realistic budget with a 10–15% contingency, finalizing the kitchen layout, selecting cabinets and appliances before ordering materials, confirming permits, verifying contractor licensing and insurance, preparing for demolition, coordinating construction in the correct sequence, completing inspections, and finishing with a punch list and warranty review.
The most expensive remodeling mistakes happen when decisions are made out of order. For example, ordering cabinets before appliance dimensions are finalized or beginning demolition before permits and long-lead materials are secured can add weeks of delays and thousands of dollars in unexpected costs.
Kitchen Remodel Checklist at a Glance
Phase | Main Goal | Biggest Risk |
|---|---|---|
Planning | Define scope and budget | Underestimating costs |
Design | Finalize layout | Appliance clearance issues |
Permits | Obtain approvals | Stop-work orders |
Material Ordering | Order long lead items | Cabinet delays |
Demolition | Remove old kitchen | Hidden damage |
Rough-ins | Plumbing & electrical | Inspection failures |
Installation | Cabinets, flooring, counters | Incorrect sequencing |
Finish Work | Fixtures and appliances | Change orders |
Final Walkthrough | Punch list | Warranty problems |
Most kitchen remodel checklists tell you what to do. Few explain what the words mean.
When a contractor mentions a “rough-in,” “allowance,” “field measure,” or “change order,” the homeowner needs to understand what is at stake before signing anything. When a cabinet supplier references “lead time” or a countertop fabricator says “template after install,” the timeline only makes sense if you know why those steps exist and why they happen in that order.
This kitchen remodel checklist glossary covers every phase, from early planning through final walkthrough. Each term includes a plain-English definition and a checklist question so you can use it as a decision tool, not just a vocabulary list.
Who should use this: Homeowners preparing for a first remodel or comparing bids. Contractors, designers, and dealers who want a shared planning reference they can hand to clients.
Get a free design consultation if you are working with a licensed contractor or authorized retailer in Washington and need cabinet, countertop, or material planning support.
Quick Kitchen Remodel Checklist
Before reading the full glossary, here is the condensed kitchen renovation checklist. Every item below connects to a deeper explanation in the sections that follow.
Planning and Scope
Define why you are remodeling: style, dysfunction, storage, resale, safety, or appliance failure
Choose your scope tier: cosmetic refresh, pull-and-replace, layout change, or gut remodel
Set a budget range with a separate 10 to 15% contingency
Decide whether you will live in the home during construction
Design and Layout
Confirm work zones: prep, cooking, cleanup, storage, beverage, trash/recycling
Check traffic flow, island clearances, and every appliance door swing
Lock sink, range, refrigerator, dishwasher, microwave, and hood locations
Choose cabinet style, construction type, door profile, hardware, and storage accessories
Confirm countertop material, edge profile, sink type, backsplash, flooring, lighting, and fixtures
Permits and Contractor Verification
Verify Washington contractor registration, bond, insurance, and trade licensing
Confirm who pulls permits and who schedules inspections
Determine whether the project involves electrical, plumbing/gas, ventilation, wall, or structural work
For pre-1978 homes, discuss lead-safe work practices before any demolition
Procurement
Confirm appliance specifications before cabinet order
Complete a field measure before final cabinet order
Confirm cabinet lead time, delivery, staging, and damage inspection process
Schedule countertop templating only after cabinet installation
Verify flooring and backsplash availability
Before Demolition
Approve final drawings and scope of work
Set up your temporary kitchen
Pack out existing cabinets and drawers
Protect floors, access routes, and adjacent rooms
Confirm dumpster/debris plan, parking, deliveries, and utility interruptions
Construction Sequence
Demolition
Rough plumbing, electrical, mechanical
Inspections before walls are closed
Drywall, patch, paint prep
Flooring and cabinet installation
Countertop template, fabrication, installation
Backsplash, fixtures, appliances, hardware, finish electrical/plumbing
Final inspection, punch list, cleanup, warranty documents
The scope of a typical kitchen remodel is larger than most people expect. The 2026 Houzz Kitchen Trends Study found that 52% of renovating homeowners modify their kitchen layout, 42% upgrade home systems, 68% replace all cabinets, and 87% hire at least one professional. These are not cosmetic projects for most people. They are system-level renovations that demand careful coordination.
Scope Terms: Know What Kind of Remodel You Are Planning
The single most useful question in a kitchen remodel planning checklist is not “What is the average cost?” It is “What scope tier am I actually buying?”
Cost varies wildly depending on whether you are swapping finishes or tearing out walls. The 2026 Houzz kitchen report found a national median spend of $55,000 for major remodels (where at least all cabinets and appliances are replaced) and $20,000 for minor remodels. But the top 10% of major remodel spenders hit $150,000 or more. In the Seattle area, practitioners on Reddit describe quotes ranging from $60,000 to $150,000 for a single project depending on wall removal, flooring scope, island size, and utility relocation.
Stop chasing a single number. Define your scope tier instead.
Cosmetic Refresh
Updates to visible finishes without changing the layout or systems. Examples: paint, hardware, lighting swaps, backsplash, faucet replacement, or cabinet refinishing.
Checklist question: Are plumbing, electrical, gas, ventilation, walls, and structure all staying untouched?
Pull-and-Replace Remodel
Replacing cabinets, countertops, appliances, fixtures, and finishes while keeping the same basic layout. This is the most common mid-range project.
Checklist question: Are the sink, range, dishwasher, refrigerator, and hood staying in their current locations?
For a detailed breakdown of cabinet costs in Washington, see the pricing guide.
Layout Change
Moving major work centers, appliances, utilities, walls, windows, or doors. This is where costs jump because it pulls in additional trades: plumbing, electrical, gas, structural, and sometimes mechanical.
Checklist question: Which trade scopes and permits are triggered by the new layout?
Practitioners on Reddit consistently point out that avoiding appliance relocation is the first budget-control lever. Moving a sink or range is not just a design decision. It can change cabinets, countertops, plumbing, electrical, gas lines, flooring patches, permits, inspections, and the schedule.
Gut Remodel
Removing the kitchen down to walls, subfloor, or framing and rebuilding everything. Gut remodels expose the most hidden conditions and require the most inspections.
Checklist question: Are you budgeted for hidden conditions, drywall, flooring tie-ins, multiple inspections, and schedule contingency?
Structural Change
Altering framing, load-bearing walls, beams, openings, or lateral bracing. This often requires a structural engineer and a building permit. Seattle’s SDCI guidance confirms that house remodels involving additions or alterations need a construction permit, though smaller remodels may qualify for a simpler subject-to-field-inspection path. Confirm the permit path before demolition, not after.
Budget Terms: Words That Control the Money
Allowance
A placeholder dollar amount in the contract for a product not yet fully selected. Common for countertops, lighting fixtures, or tile. Allowances that look generous in the contract can turn out to be thin once real selections are priced.
Checklist question: Is the allowance realistic for the quality you actually want? Ask what happens if your selection exceeds the allowance.
Exclusion
A task, fee, trade, or material explicitly not included in the contract price. Exclusions are where surprises live. Common exclusions include permit fees, engineering, lead or asbestos testing, utility company work, HOA paperwork, appliance purchases, and plumbing or electrical reconnection for specific fixtures.
Checklist question: Have you read every exclusion line in the contract?
Contingency
Money reserved for unknowns: hidden water damage, old wiring, framing rot, code corrections, or material changes. Most experienced remodelers recommend 10 to 15% above the contract price.
Change Order
A written adjustment to scope, cost, or schedule after the contract is signed. A LinkedIn design professional emphasizes that change orders should document additional materials, labor, and schedule impact before work proceeds. Verbal scope changes should be prohibited.
Checklist question: Does your contract define the change order process, including who approves, how fast pricing is confirmed, and what happens to the timeline?
Bid Leveling
Comparing contractor bids using the same scope, materials, drawings, and assumptions. Without bid leveling, you are comparing different projects at different prices and the lowest number may not be the best value.
Checklist question: Did every contractor price the exact same drawings, specifications, and material selections?
Final Payment
The last payment, ideally tied to punch-list completion, final inspections, and warranty documentation.
Checklist question: Is punch-list completion required before final payment is released?
Typical Kitchen Remodel Budget Breakdown
Many homeowners know the total remodel budget but not where the money goes.
Understanding cost distribution helps prevent overspending on one category.
Category | Typical Share |
|---|---|
Cabinets | 25–35% |
Labor | 20–30% |
Countertops | 10–15% |
Appliances | 10–20% |
Flooring | 5–10% |
Electrical | 5–10% |
Plumbing | 4–8% |
Lighting | 2–5% |
Permits | 1–3% |
Contingency | 10–15% |
Design and Layout Terms
Work Triangle
The traditional spatial relationship between sink, range/cooktop, and refrigerator. Still a useful concept, but insufficient on its own for modern open kitchens.
Work Zones
A more flexible planning model that organizes the kitchen into functional areas: prep, cooking, cleanup, storage, serving, beverage, and trash/recycling. This approach works better for larger kitchens and multi-cook households.
Landing Area
Counter space beside appliances or sinks for safe staging. Without landing areas, hot pans go on stovetops that are still in use and wet dishes pile up in walkways.
Work Aisle
The space where someone stands and works between counters, cabinets, or appliances. NKBA planning guidelines provide professional clearance standards for kitchen layouts, covering fixture placement, accessibility, and storage systems.
Walkway
The route people use to pass through the kitchen without crossing the cook zone. If the walkway cuts through the work triangle, traffic will interrupt every meal.
Appliance Door Swing
The space needed to fully open refrigerator doors, dishwasher doors, oven doors, microwave doors, and cabinet doors or drawers without blocking work aisles or other appliances.
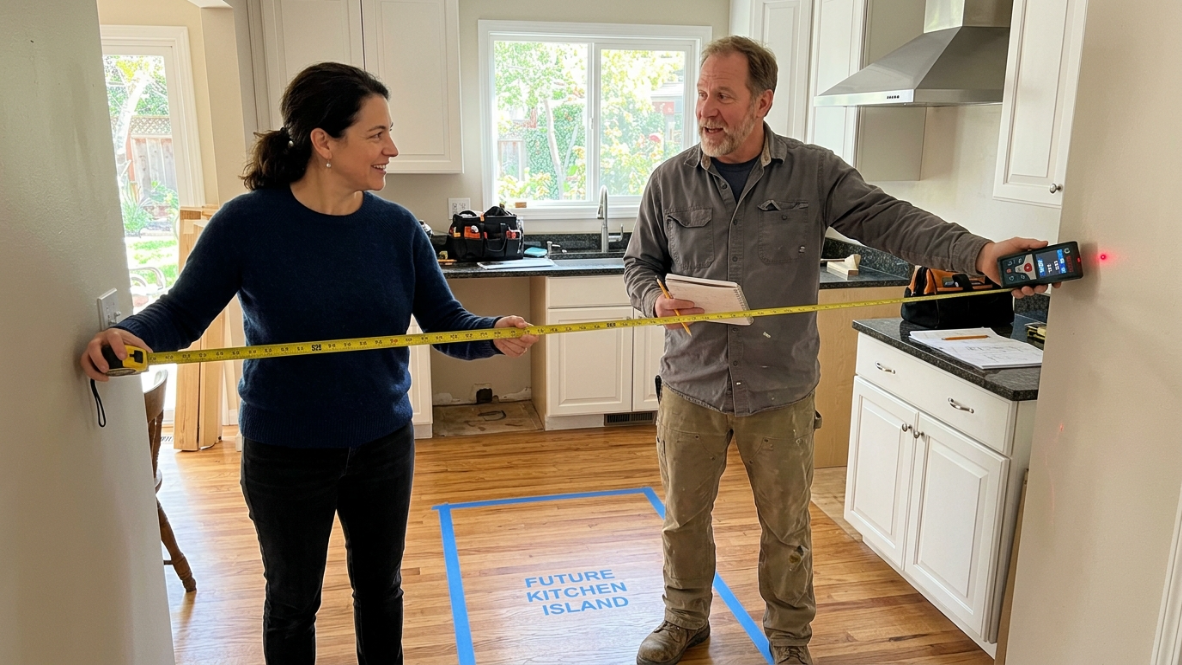
One homeowner on Reddit described discovering after their island base was installed that the walkway between the island and wall cabinets was only 20 inches, raising serious concerns that the dishwasher and oven doors could not open fully. Check every door swing on the plan before ordering cabinets.
Island Clearance
The distance between the island and perimeter cabinets, walls, or appliances. The 2026 Houzz report found that 58% of renovating homeowners add or update an island, and 53% of those islands include at least one appliance like a dishwasher or microwave. An island is not just cabinetry. It can trigger electrical, plumbing, flooring, countertop, and inspection decisions.
Storage Plan
The map of where dishes, cookware, pantry items, utensils, small appliances, trash, and cleaning supplies will live. Houzz regret threads repeatedly surface complaints about inadequate storage, missing lower drawers, and counters cluttered with appliances that have no home.
Daily-use test before approving a layout: Where do dishes unload? Where do pots go? Where does trash sit? Can two people cook simultaneously? Can kids grab snacks without crossing the cook zone? Does the dishwasher door block the sink or a main aisle?
Cabinet Terms
Cabinets are the backbone of a kitchen remodel. With 68% of renovating homeowners replacing all cabinets according to the Houzz study, this is the single largest material decision for most projects.
Field Measure
The final measurement of the actual room before cabinets are ordered. Walls are rarely perfectly straight or square. A field measure catches discrepancies before they become expensive problems on installation day.
For a step-by-step walkthrough, see the guide on how to measure kitchen cabinets.
Checklist question: Who owns the measurement risk: the homeowner, the contractor, or the cabinet supplier?
Cabinet Layout
The drawing showing each cabinet, filler, appliance opening, panel, end panel, toe kick, trim piece, and clearance. This document must match reality. Any missing filler or overlooked panel will show up as a problem during installation.
3D Rendering
A visual preview of the kitchen layout and finish selections. Renderings help homeowners and trade partners confirm that the design, color, and proportions look right before anyone places an order.
RTA Cabinets (Ready-to-Assemble)
Cabinets shipped flat-packed for assembly before or during installation. RTA can reduce lead times and shipping costs, but someone needs to assemble them correctly and inspect them before installation. Read the comparison of RTA vs. custom cabinets for a deeper look at the tradeoffs.
Framed Cabinets
Cabinets built with a face frame on the front of the box. Traditional construction commonly paired with Shaker and transitional door styles.
Frameless Cabinets
Cabinets without a face frame, often called European-style. They offer wider interior access and a cleaner look with slab or minimal-profile doors. For a side-by-side comparison, see the framed vs. frameless guide.
Shaker and Slim Shaker
Shaker is a recessed-panel door style with clean lines used across traditional, transitional, and even some modern kitchens. Slim Shaker is a narrower-rail variation that reads more contemporary while keeping the same basic profile.
Filler
A narrow strip used to close gaps between cabinets and walls or to prevent doors and drawers from hitting adjacent surfaces. Fillers are small parts that cause big headaches when forgotten.
End Panel
A finished panel applied to exposed cabinet sides so they match the door finish.
Overlay
How much of the cabinet frame or box the door covers. Full overlay covers nearly the entire face. Partial overlay leaves some frame visible.
Soft-Close Hardware
Hinges or drawer slides with a damping mechanism that slows the closing motion. Standard on most mid-range and higher cabinets today.
Cabinet Lead Time
The time between order approval and cabinet availability. A LinkedIn practitioner timeline recommends ordering custom cabinetry 12 to 16 weeks before the planned installation date. In-stock lines with local warehousing can shorten this window significantly, but the order still needs to be confirmed before demolition.
Checklist question: Is the cabinet lead time confirmed in writing, and does the construction schedule account for it?
For contractors, designers, and dealers in Washington: If you need cabinet layouts, 3D renderings, or lead-time coordination for a kitchen project, register as a trade partner with Krafter’s Land for design and product planning support.
Countertop and Backsplash Terms
Countertop Template
A precise measurement taken after base cabinets are installed and leveled. The fabricator uses this template to cut the countertop, sink opening, cooktop opening, edges, and seams. Countertops cannot be fully fabricated until cabinets are in place because even small discrepancies in wall angles or cabinet positioning affect fit.
Checklist question: Is the template scheduled only after cabinets are level, secured, and final?
Quartz Countertop
An engineered stone surface made from crushed quartz and resin. Engineered quartz has held the top spot in Houzz kitchen trends surveys, chosen for its durability and low maintenance. It is not the same as natural quartzite.
Prefab Quartz vs. Slab Quartz
Prefab quartz comes in pre-manufactured pieces with standard sizes and edge profiles, often faster and less expensive. Slab quartz is cut and fabricated from full-size slabs, allowing more flexibility in edge profiles, seam placement, and large island pieces. For a detailed breakdown, see prefab vs. slab quartz.
Fabrication
The process of cutting, edging, polishing, and preparing countertop pieces. This includes sink cutouts, cooktop cutouts, and seam preparation. Fabrication typically adds one to two weeks after templating, sometimes more depending on the material.
Seam Plan
Where countertop pieces meet. Seam locations should be discussed with the fabricator before templating, especially for large islands or L-shaped counters where visible seams can disrupt the pattern.
Edge Profile
The shape of the countertop edge: eased, beveled, bullnose, ogee, mitered, or waterfall. Different profiles affect aesthetics, cost, and how edges feel under daily use.
Backsplash
The wall finish above countertops, typically tile, slab, or panel. A Houzz forum contributor recommends choosing cabinets and countertops first, then deciding the backsplash once those materials can be viewed together in person. This prevents mismatched finishes that look fine on a screen but clash in the room.
Flooring Terms
Subfloor
The structural layer beneath visible flooring. Kitchen remodels often reveal subfloor damage, unevenness, or moisture issues that must be corrected before new flooring goes down.
Floor Leveling
Correcting uneven areas before installing cabinets or flooring. Skipping this creates problems with cabinet alignment, door operation, and flooring joints.
Flooring Under Cabinets
Whether finish flooring runs wall-to-wall before cabinets are set or stops at cabinet bases. This decision affects future cabinet replacement, appliance access, and flooring transitions.
SPC / LSPC Flooring
Rigid-core vinyl flooring categories. SPC (stone polymer composite) is popular in kitchens because it handles moisture and temperature changes well. For a full explanation, read the SPC flooring guide.
Flooring Transition
Where kitchen flooring meets adjacent rooms. Transition planning is important in open floor plans or when kitchen flooring differs from adjoining spaces.
Permit, Trade, and Inspection Terms
Permit requirements depend on city, county, scope, and building type. This section uses Seattle and King County as examples because they represent common patterns across Washington, but always verify requirements with your local jurisdiction and contractor before starting work.
Building Permit / Construction Alteration Permit
The permit path for remodels involving additions, alterations, structural changes, or other covered work. Seattle SDCI’s guidance says a construction addition/alteration permit is needed for additions or remodels, though small projects may qualify for a subject-to-field-inspection permit.
Electrical Permit
Seattle SDCI says a permit is needed for all electrical work with limited exceptions. If a homeowner is not performing the work, they must hire a licensed electrical contractor. Kitchen electrical work commonly includes outlet placement, island power, dedicated appliance circuits, under-cabinet lighting, garbage disposal and dishwasher connections, range power, panel capacity, and GFCI/AFCI protection.
Plumbing Permit and Gas Piping Permit
Public Health, Seattle & King County, says that installing, relocating, or changing a plumbing or gas piping system requires a permit. This applies to sink relocation, dishwasher relocation, refrigerator water lines, pot fillers, gas range conversions, gas line relocation, shutoff valve replacement, and drain or vent changes.
Mechanical Permit
Required for mechanical systems including kitchen hood exhaust installations. Many generic kitchen remodel checklists mention range hoods without connecting them to duct routing, exterior wall penetrations, makeup air requirements, or mechanical permit review.
Rough-In
Electrical, plumbing, gas, or mechanical work installed behind walls before they are closed up. This is when outlet placement, pipe routing, and vent locations are finalized.
Cover Inspection
An inspection before electrical wiring or other rough-in work is covered by drywall. If this inspection is missed or failed, walls may need to be opened again.
Final Inspection
The inspection after the project or permitted portion is complete. A Seattle Reddit thread highlighted that the city maintains online permit records, and buyers’ agents may look up remodel permits when evaluating homes. Skipping permits can create resale problems years later.
Checklist questions: Who pulls each permit? Who schedules each inspection? How will final inspection approval be documented?
Lead-Safe Work (RRP)
EPA’s Renovation, Repair, and Painting Rule requires firms performing paid renovation work that disturbs painted surfaces in pre-1978 homes to be certified and use lead-safe practices. For Seattle-area older homes, discuss whether pre-1978 painted surfaces will be disturbed before any demolition begins.
Contractor and Bid Terms
General Contractor (GC)
The party coordinating trades and overall construction. In most kitchen remodels above the cosmetic level, a GC manages scheduling, subcontractors, inspections, and material coordination.
Licensed / Registered Contractor
Washington’s Department of Labor & Industries provides a Verify tool to confirm contractor registration, bond status, insurance, safety citations, lawsuits against the bond, and trade certifications. Current bond requirements are $30,000 for general contractors and $15,000 for specialty contractors. Use this tool before signing any contract.
Allowance Schedule
A list of all placeholder amounts for selections not yet finalized. Review the allowance schedule alongside the exclusion list to understand what the contract price actually covers and where you might spend more.
Payment Schedule
When payments are due. Typical structures include a deposit, progress payments tied to milestones (such as cabinet delivery, rough-in completion, or countertop installation), and a final payment tied to punch-list resolution.
Warranty Documentation
Written product and workmanship warranty details for cabinets, countertops, appliances, fixtures, and labor. Collect all warranty documents before releasing final payment.
Questions to Ask Before Signing
Who pulls each permit?
Who schedules each inspection?
What is excluded from the contract?
What happens if hidden damage is found?
What is the change order process?
Who pays for inspection corrections?
Who receives and inspects materials at delivery?
Who is responsible for cabinet field measurements?
Who coordinates countertop templating?
Who handles plumbing and electrical reconnection for appliances?
What is the final walkthrough process?
Procurement and Lead-Time Terms
Late ordering is one of the most common causes of kitchen remodel delays. Practitioners on Reddit report that homeowners often learn too late that appliance dimensions should be confirmed before cabinets are ordered, because appliance specs directly influence the cabinet layout.
Lead Time
The time between placing an order and receiving the product. A LinkedIn practitioner timeline recommends ordering custom cabinetry 12 to 16 weeks ahead, appliances 6 to 12 weeks ahead, countertops 6 to 10 weeks ahead, and backsplash tile and flooring 4 to 8 weeks ahead. The core warning: waiting until after demolition can add weeks or months to the project.
Long-Lead Item
Any product that can delay the entire project if ordered late. Custom cabinets, specialty appliances, natural stone slabs, and certain tile patterns are common culprits.
Backorder
A product unavailable at the expected time. Always discuss the substitution process before ordering, so you are not making rushed decisions mid-construction.
Delivery Staging
Where materials are delivered and stored before installation. Cabinets, flooring, tile, and countertops all need protected storage space. Confirm driveway access, building entry dimensions, and staging area before the first delivery arrives.
Damage Inspection
Check every product immediately when it arrives. Document any damage with photos and report it to the supplier before installation. Installed damaged materials are far harder to resolve.
The Cabinet Order Decision Gate
Do not order cabinets until these items are confirmed:
Appliance model numbers and dimensions for every appliance
Sink model and mounting type
Range or cooktop type and dimensions
Hood model and dimensions
Dishwasher panel requirements (if applicable)
Refrigerator depth and hinge side
Final field measurements
Cabinet layout with all fillers, panels, and clearances
Door and drawer swing review
Approval signature from homeowner or decision-maker
Browse product categories to coordinate cabinet, countertop, flooring, and accessory selections before finalizing your kitchen remodel material checklist.
Living Through Construction
Most families stay home during a kitchen remodel. Competitor content typically says “set up a temporary kitchen” and leaves it at that. Community threads reveal the real planning gaps.
Temporary Kitchen
A substitute food-prep area, usually set up in a dining room, garage, or spare room. A Reddit preparation thread suggests planning for a temporary sink or at least access to a laundry room sink, because dishwashing is the part most people forget.
Temporary kitchen sub-checklist:
Refrigerator (move to temporary space or keep in place if accessible)
Microwave and/or hot plate
Coffee maker
Water access for drinking, cooking, and dishwashing
Trash and recycling bins
Paper plates, cups, and disposable utensils
Pet gate or child safety barrier for the construction zone
Dust barrier between construction and living space
Safe walking route that avoids the work area
Meal plan for the estimated construction duration, with backup takeout nights
Dust Control
Barriers, floor protection, and air practices that keep construction dust from spreading through the house. Confirm what dust control methods are included in the contract.
Utility Interruption
Planned shutoffs of water, power, gas, or HVAC. Know when interruptions will happen and how long they will last, especially if anyone is working from home.
Work Hours
The approved schedule for noisy work, deliveries, and equipment use. Confirm building, HOA, or municipal rules about construction hours before work starts.
Construction Sequence Terms
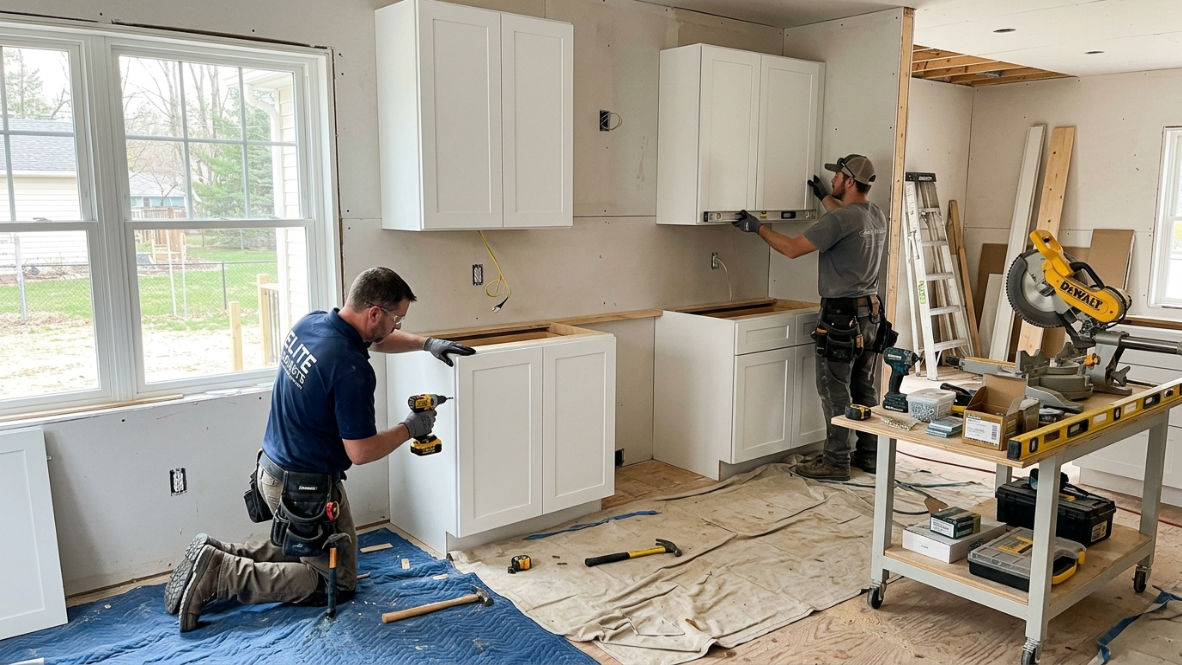
The construction sequence matters because compressing or reordering incompatible steps creates damage, rework, and a worse result.
Preconstruction Meeting
The final alignment meeting before work begins. Confirm scope, schedule, access, parking, protection, dust control, utility interruptions, and communication expectations.
Demolition (Demo)
Removal of old cabinets, countertops, flooring, fixtures, and finishes. Do not start demo until permits are confirmed, long-lead materials are ordered, and the temporary kitchen is ready.
Rough Plumbing / Rough Electrical / Rough Mechanical
Behind-the-wall trade work. This is when pipe routes, wire runs, outlet boxes, vent ducts, and gas lines are installed or relocated.
Cover Inspection
The inspection that must happen before rough-in work is covered by drywall. Missing this step can mean reopening finished walls.
Drywall
Wall repair or replacement after rough-ins are inspected and approved.
Cabinet Installation
Setting, leveling, fastening, and aligning cabinets. Cabinets must be level and secure before countertop templating can be scheduled.
Countertop Templating and Installation
Templating happens after cabinets are installed. Fabrication follows and typically adds one to two weeks or more. Then the fabricated countertops are installed.
Backsplash Installation
Tile, slab, or panel installation after countertops are set. Some homeowners choose backsplash material earlier but wait to install until countertops are in place so everything lines up.
Finish Electrical / Finish Plumbing
Installing outlets, switches, light fixtures, faucets, garbage disposals, dishwasher connections, and appliance hookups.
Punch List
The final list of incomplete or incorrect items. Common punch-list items include cabinet door alignment, drawer adjustments, paint touch-ups, missing hardware, grout repairs, and trim gaps.
Checklist question: Who fixes punch-list items, by when, and is completion tied to final payment?
Final Walkthrough
The owner and contractor review the completed project together. Test every appliance, open every door and drawer, run every faucet, and inspect every surface before signing off.
Decision Gates: Six Checkpoints That Prevent Expensive Mistakes
The most costly kitchen remodel mistakes happen when a decision is made too late or skipped entirely. These six gates create hard stops where the project should not move forward until required items are confirmed.
Gate 1, Before Getting Bids: Current kitchen photos, rough measurements, pain-point list, must-have vs. nice-to-have priorities, appliance preferences, budget range, timeline constraints, and scope tier.
Gate 2, Before Signing the Contract: Written scope, exclusions, allowances, payment schedule, permit responsibility, change order process, insurance and registration verification, material responsibility, site protection plan, and warranty terms.
Gate 3, Before Cabinet Order: Final field measure, all appliance specs, sink and faucet specs, hood specs, cabinet layout with fillers and panels, island clearances, door and drawer swing review, finish selections, and approval signature.
Gate 4, Before Demolition: Permits or permit path confirmed, long-lead materials ordered, delivery and staging plan, temporary kitchen set up, pack-out completed, dust and access barriers in place, utility interruption plan, and child/pet safety plan.
Gate 5, Before Countertop Template: Base cabinets fully installed, level, and secured. Panels and fillers installed. Sink, cooktop, and appliance specs onsite. Overhangs confirmed. Seam plan discussed. Faucet and accessory hole locations confirmed.
Gate 6, Before Final Payment: Punch list completed or documented with deadlines. Final inspections closed. Every appliance tested. Cabinet doors and drawers adjusted. All plumbing and electrical fixtures working. Warranty documents and care instructions collected. Leftover materials labeled and stored.
Kitchen Remodel Timeline: How Long Does Each Stage Take?
Many homeowners ask how long a kitchen remodel actually takes. While every project is different, most delays happen because materials arrive late or product selections change after construction begins.
Typical Kitchen Remodel Timeline
Stage | Typical Time |
|---|---|
Planning & Design | 2–8 weeks |
Contractor Bidding | 1–3 weeks |
Permits | 1–6 weeks |
Cabinet Manufacturing | 4–16 weeks |
Demolition | 2–5 days |
Rough Plumbing & Electrical | 3–10 days |
Inspections | 1–5 days |
Drywall & Painting | 4–10 days |
Cabinet Installation | 3–7 days |
Countertop Template | 1 day |
Countertop Fabrication | 1–3 weeks |
Countertop Installation | 1–2 days |
Backsplash | 2–5 days |
Finish Work | 3–7 days |
Punch List | 1–2 weeks |
Scope Creep: Why One Change Leads to Three More
One term that deserves its own warning: scope creep. Changing one visible finish often exposes adjacent work that was not in the original plan. Removing a backsplash can damage the drywall behind it. Replacing cabinets can reveal flooring gaps. Changing a countertop can require a different sink, faucet, or plumbing connection. Switching to a gas range can trigger gas line work, electrical changes, and hood upgrades.
Practitioners on Reddit note that even “budget” choices like cabinet refacing can create knock-on costs once the project touches adjoining finishes and systems. The best defense is a clear scope of work, a realistic contingency, and a written change order process that documents every adjustment before work proceeds.
Frequently Asked Questions
What is a kitchen remodel checklist?
A kitchen remodel checklist is a planning tool that organizes the decisions, documents, materials, permits, trades, and inspections needed to complete a kitchen renovation. A strong checklist also defines the terms contractors use so homeowners can participate in decisions with confidence.
What should I decide before ordering kitchen cabinets?
Appliance specifications for every appliance, sink type and model, hood dimensions, cabinet style, layout with fillers and panels, island clearances, door and drawer swings, and a final field measure should all be confirmed before the cabinet order is placed.
Do I need permits for a kitchen remodel in Seattle?
It depends on scope. Cosmetic updates may not require a full building permit, but electrical work, plumbing and gas changes, ventilation installations, structural modifications, and wall or layout changes typically trigger permits or trade-specific permits. Seattle SDCI, King County Public Health, and your contractor should confirm the permit path before demolition.
What is the most common kitchen remodel mistake?
The most expensive mistakes usually stem from unclear scope, late product decisions, moving utilities without budget planning, ordering cabinets before appliance specs are confirmed, and approving layouts without checking clearances and door swings.
What is a countertop template?
A countertop template is the precise measurement taken after base cabinets are installed and level. The fabricator uses it to cut the countertop, sink opening, cooktop opening, edges, and seams. Templating cannot happen before cabinets are set.
How much should I budget for a kitchen remodel?
Use scope tiers instead of chasing one average number. The 2026 Houzz kitchen report found a national median of $55,000 for major remodels and $20,000 for minor remodels, but larger kitchens, structural changes, custom products, and high-cost labor markets like Seattle push totals much higher. Set aside 10 to 15% contingency above the contract price.
Can I live at home during a kitchen remodel?
Usually yes, but it requires a temporary kitchen with water access, a dishwashing plan, dust barriers, safe zones for children and pets, storage for displaced items, and clear expectations about utility interruptions and work hours.
What is a punch list?
A punch list is the final list of incomplete or incorrect items to be resolved before project sign-off and final payment. Common items include cabinet door alignment, paint touch-ups, missing hardware, grout repairs, and fixture adjustments.
Homeowners can use this kitchen remodel checklist to prepare for conversations with their licensed contractor or authorized retailer. Contractors, designers, and dealers in Washington can use it as a pre-job planning tool for cabinet, countertop, flooring, and finish coordination.
Bring your checklist, measurements, appliance specs, and inspiration photos to a Krafter’s Land showroom, or contact the team to coordinate material selections and next steps with your trade partner.